Hi there Mystical friends
I recently bought some new Distress Inks and realised I didn’t use my inks often enough,
so today I am sharing three techniques using Distress/Oxide Inks.
I have mainly Distress Inks with a few Distress Oxides thrown in.
I made three cards
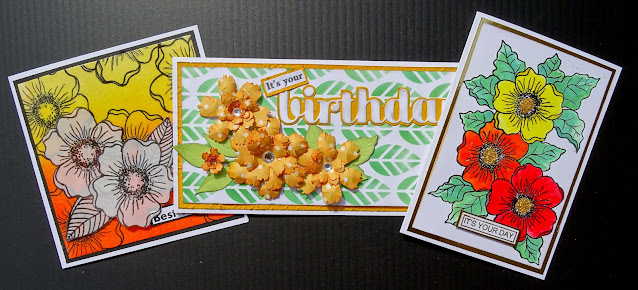
Each of the cards are a different size.
Card No. 1
This is a slimline card measuring 8″ x 4″ and fits into a standard DL envelope
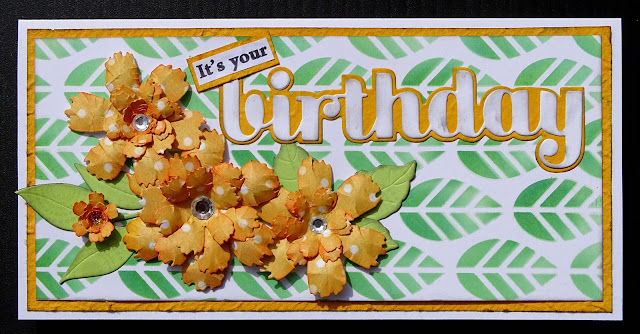
I have cut 300gsm white cardstock to 8″ x 8″ and folded it in half.
I used Cracked Pistachio Distress Oxide and Mowed Lawn Distress ink,
with a Hero Arts Blending brush, to apply colour through A Little Birdie leaf stencil.
I trimmed a piece of textured yellow cardstock to 3 3/4″ x 7 3/4″ and attached that to my card front.
Next I trimmed my inked panel to 3 1/2″ x 7 1/2″ and added that on top of the yellow cardstock.
To decorate the card I used some of the flowers I created in this video
I die cut the sentiment from white cardstock and the shadow from the yellow cardstock,
inked the edges and attached it to the front of the card about 2/3rds of the way up.

I printed the rest of the greeting, trimmed it to size, layered it onto a piece of the yellow cardstock and attached it so it was slanted and slightly over lapping the b of “birthday”
I also used the same stencil and some Squeezed Lemonade Distress Ink
on the inside of the card.
Card No. 2
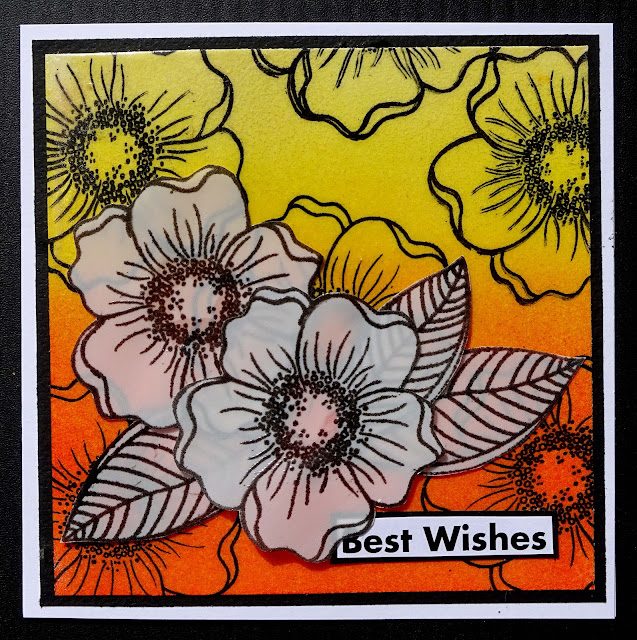
This card is 5 1/4″ square
I started with a piece of smooth white cardstock 5″ square and blended Squeezed Lemonade, Mustard Seed, Spiced Marmalade and Ripe Persimmon Distress inks, starting with the lightest colour and
working my way down to the darkest. I used a domed foam blending tool for this.
Next I used my Tim Holtz stamping platform and Woodware Mini Scented Bloom stamp
to stamp all over the background using Versafine Onyx Black ink.
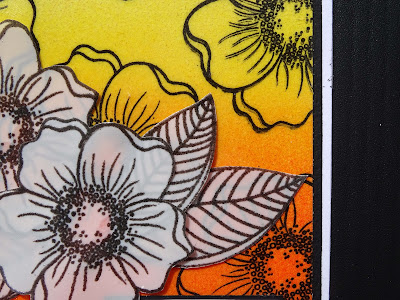
I added clear embossing powder and as the Distress Inks were still wet
the embossing powder clung to the whole background.
I had not planned on doing this but I have to say I am pretty happy with the results.
I gave it 3 or 4 coats of the clear embossing powder to get a nice high gloss.
I trimmed a piece of black cardstock to 5″ square and
the stamped panel to 4 3/4″ square and layered them onto the card front.
I did not want to completely cover the pretty background so I stamped a
couple of the same flowers and three leaves from a Paper Artsy stamp
onto some Hero Arts velum. I stamped with Versafine Onyx Black Ink
and heat embossed with clear embossing powder.
I fussy cut the flowers out and used Art Glitter glue to attach the velum,
applying the glue behind the embossing.
The sentiment came from a little pot of sentiments I keep on my desk.
They are leftovers from kits, paper packs or excess stamping/heat embossing.
I matted the sentiment onto some black cardstock and added it to the bottom right of the card.
Card No. 3
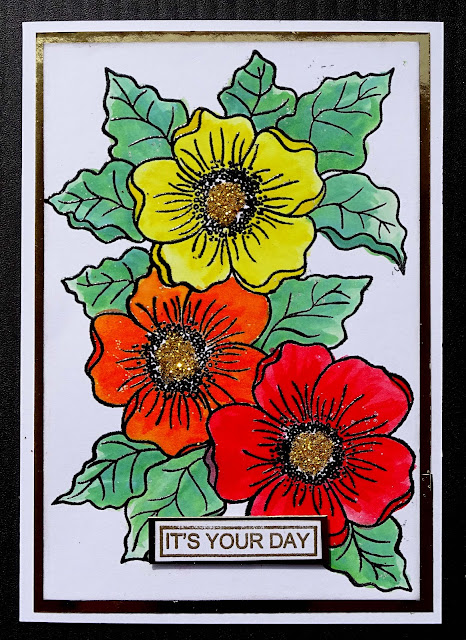
Our final card for today is 4 1/4″ x 6″
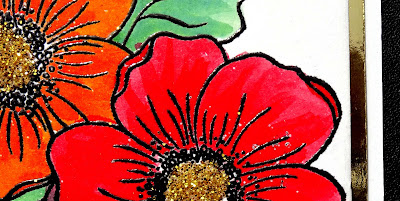
I am going to use my inks as watercolours for this card.
I stamped Woodware – Scented Blooms with Versafine Onyx Black ink onto a white cardstock panel and heat embossed it with clear embossing powder.
I used my water brush to apply the colour but you could use a normal brush if you don’t have one.
I used two colours on each area.
For the leaves I used Cracked Pistachio Distress Oxide and Mowed Lawn Distress Ink
For the yellow flower I used Squeezed Lemonade and Mustard Seed
The orange flower is Spiced Marmalade and Ripe Persimmon
And the red flower is Candied Apple and Festive Berries.
You can see how I applied the ink and shading in the video below
I cut some Gold Mirri Card to 4′ x 5 3/4″ and trimmed my flower panel to 3 3/4″ x 5 1/2″
and layered them onto the front of the card base
The sentiment is from the same place as the previous one and is gold heat embossed.
I matted it onto a piece of the gold mirri card and attached it to the card front
with a piece of scrap cardboard behind it.
A final touch to this card was to add some gold fine glitter to the centres of the flowers.
So there we have my three cards for today.
I hope you have enjoyed reading about them and I hope you will leave me a comment.
Here is the process vide.
Have fun watching it

Thank you for spending part of your day here with me today
Till next time
Stay safe
Hugs
Julie
0 Comments